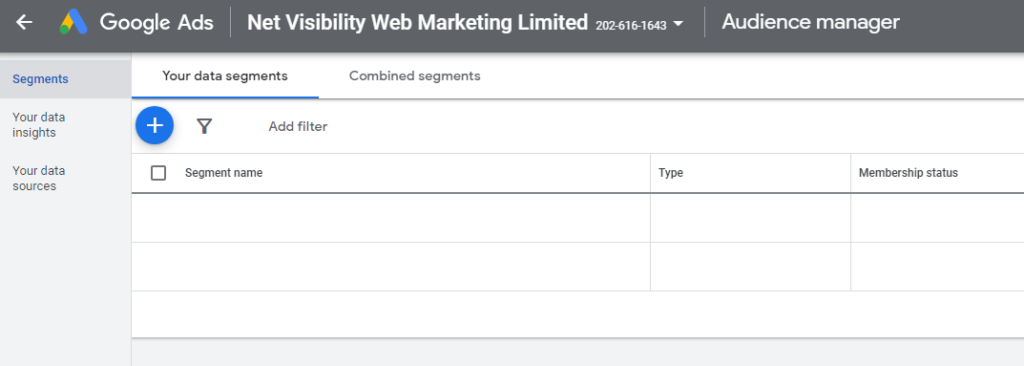
4. Click the blue plus (+) button and select ‘Customer List’ from the dropdown
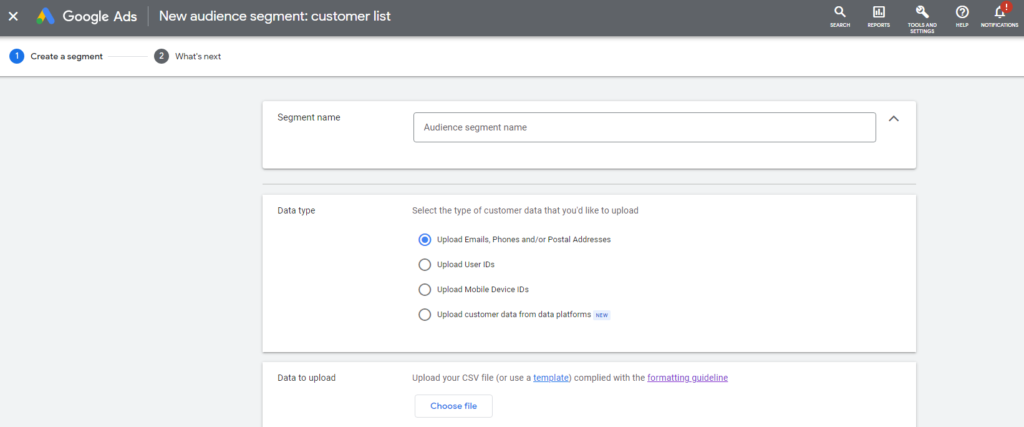
5. Give the audience a clear name, select the correct data type, and upload the file
6. Keep the ‘Membership duration’ at ‘No Expiry’, and click ‘Upload and Create’
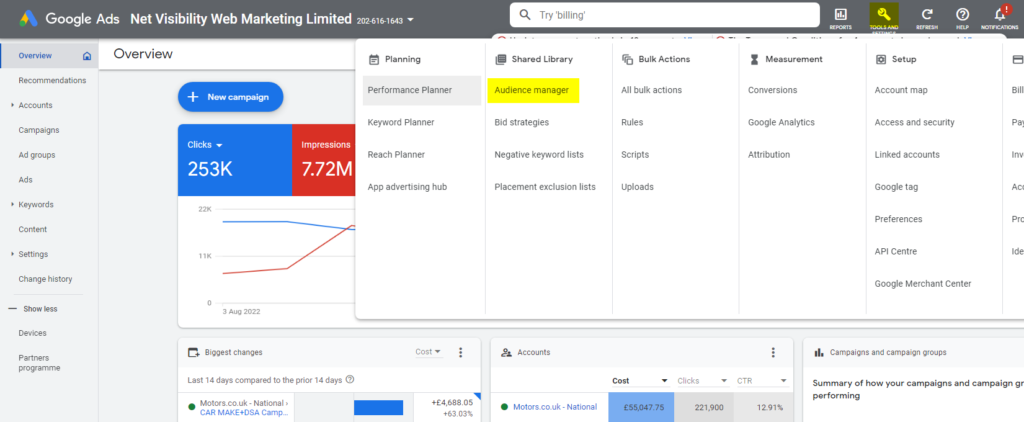
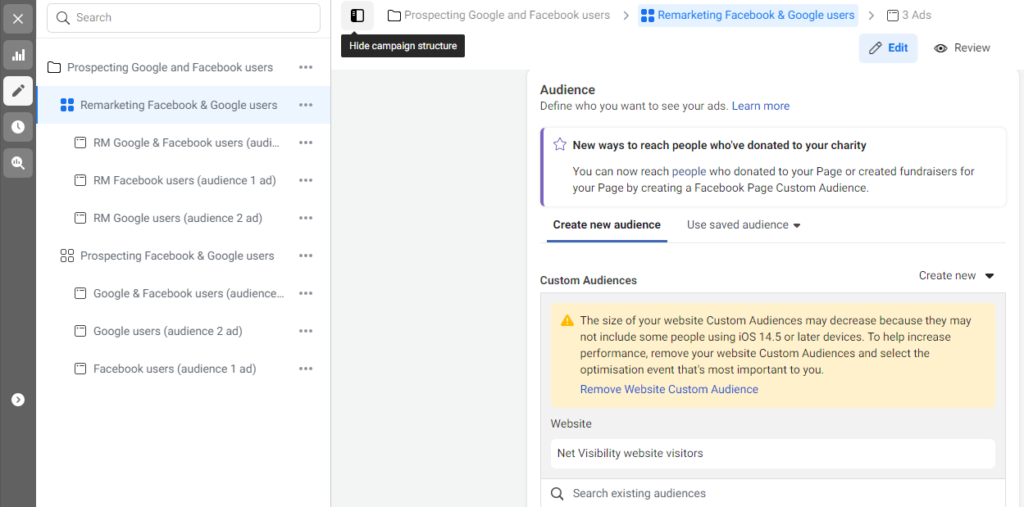
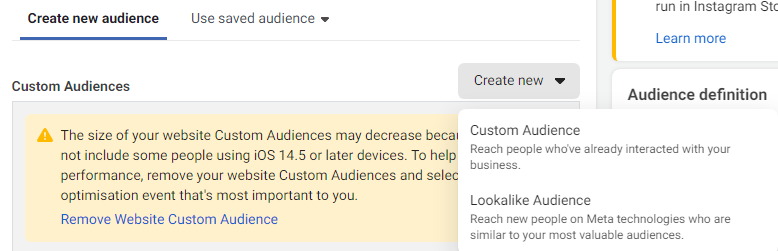
3. Select the correct ad group from the left side menu, and scroll until you reach the ‘Audience’ section
4. Click ‘Create new’, then ‘Custom Audience’
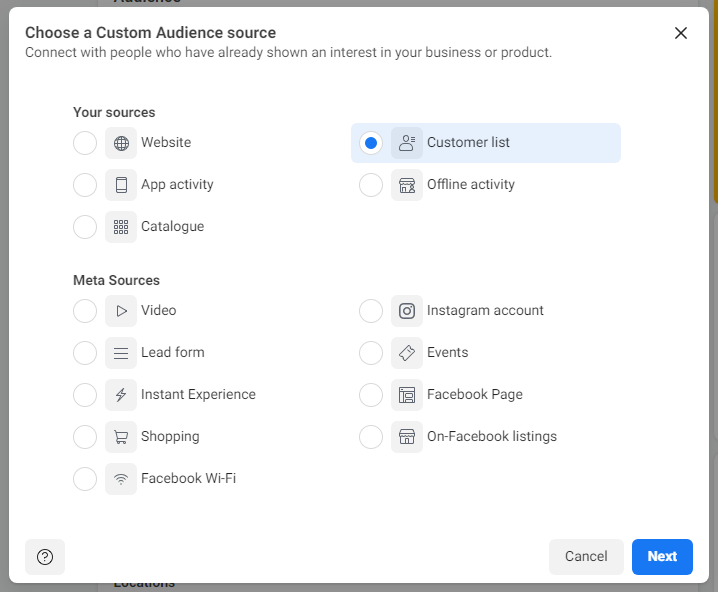
5. Select the ‘Customer list’ option, then click ‘Next’
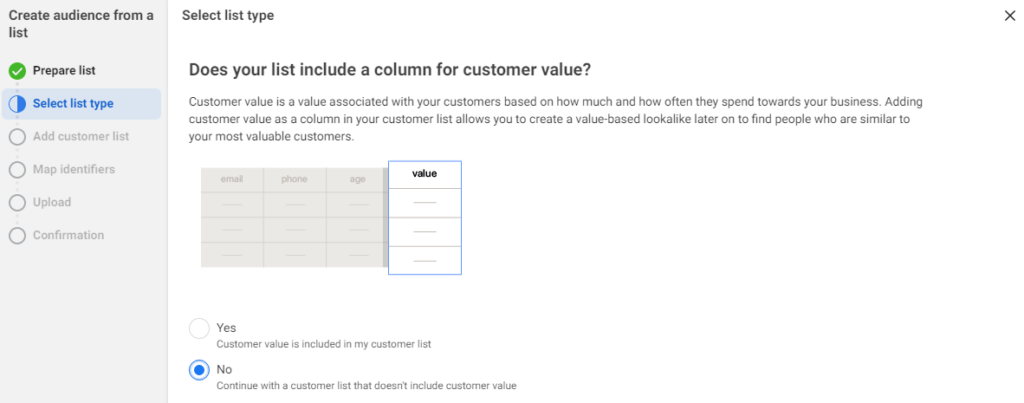
6. Click ‘Next’ again to skip the ‘Prepare list’ tab, then select ‘No’, then ‘Next’ again
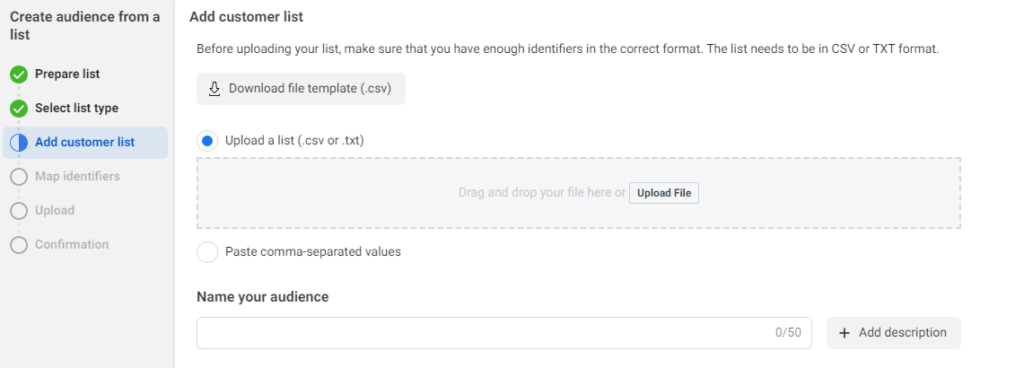
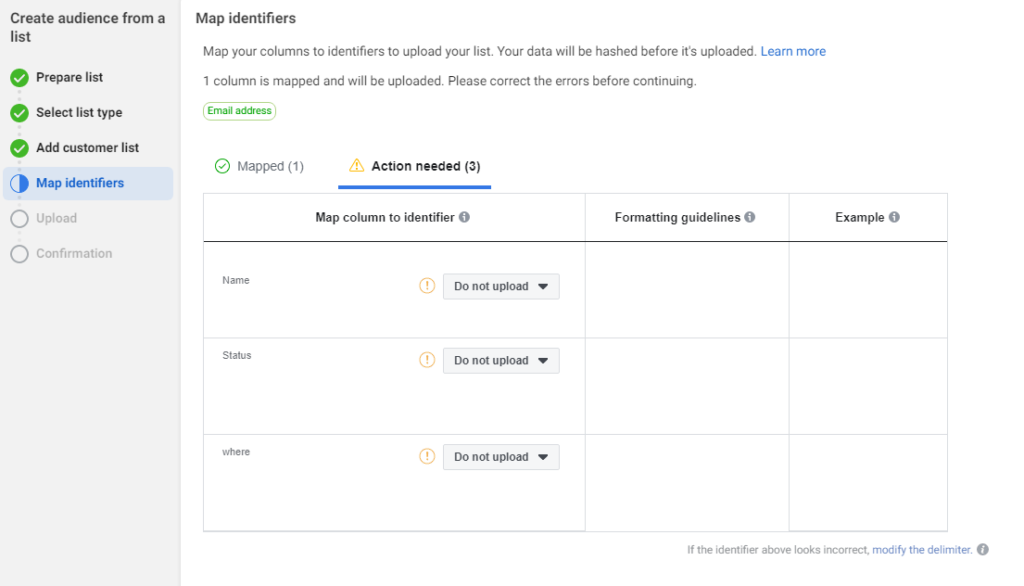
7. Upload the list and name it clearly
8. If needed, choose the correct option for each column, then click ‘Import and Create’